How To: LXC and LXD on Arch Linux - Part 1
You have some lovely cans.

If you find any of the software shown here useful and want to show the developers some ❤️, you might consider giving them a ⭐ on GitHub or perhaps fuel their next update or release by buying them a ☕, even better would be something a little stronger 🍺 by becoming a Patron on Patreon or supporting them using LibrePay, OpenCollective or simply becoming a Sponsor on their project on GitHub. A little love goes a long way with these developers.
LXC (Linux Containers)
Installation:
Update system:
- Make sure everything is up-to-date on your Arch Linux system with a package repository update and system upgrade.
1
sudo pacman -Syu
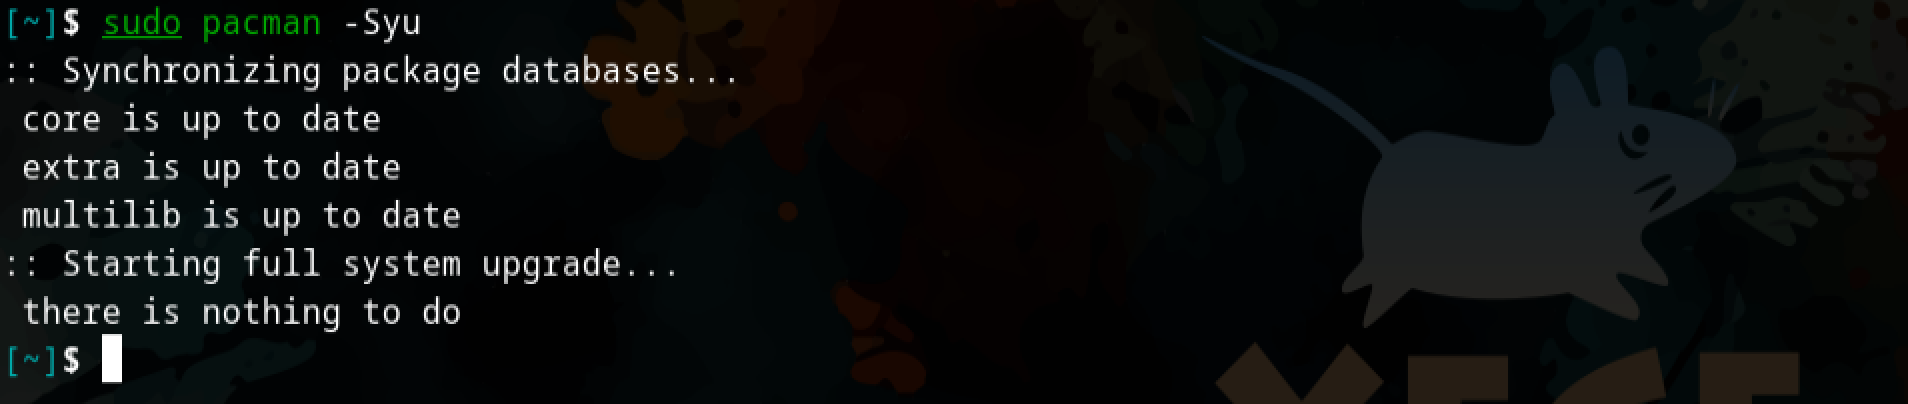 System update with sudo pacman -Syu
The beginning section of this How: To will be dealing with LXC directly and how to interact with the service without a manager like LXD and Incus (More on this at a later stage).
Install:
- Install the lxc (maintained by Sergej Pupykin and Morten Linderud) & arch-install-scripts (maintained by David Runge and Morten Linderud) packages using
pacman.1
sudo pacman -S lxc arch-install-scripts
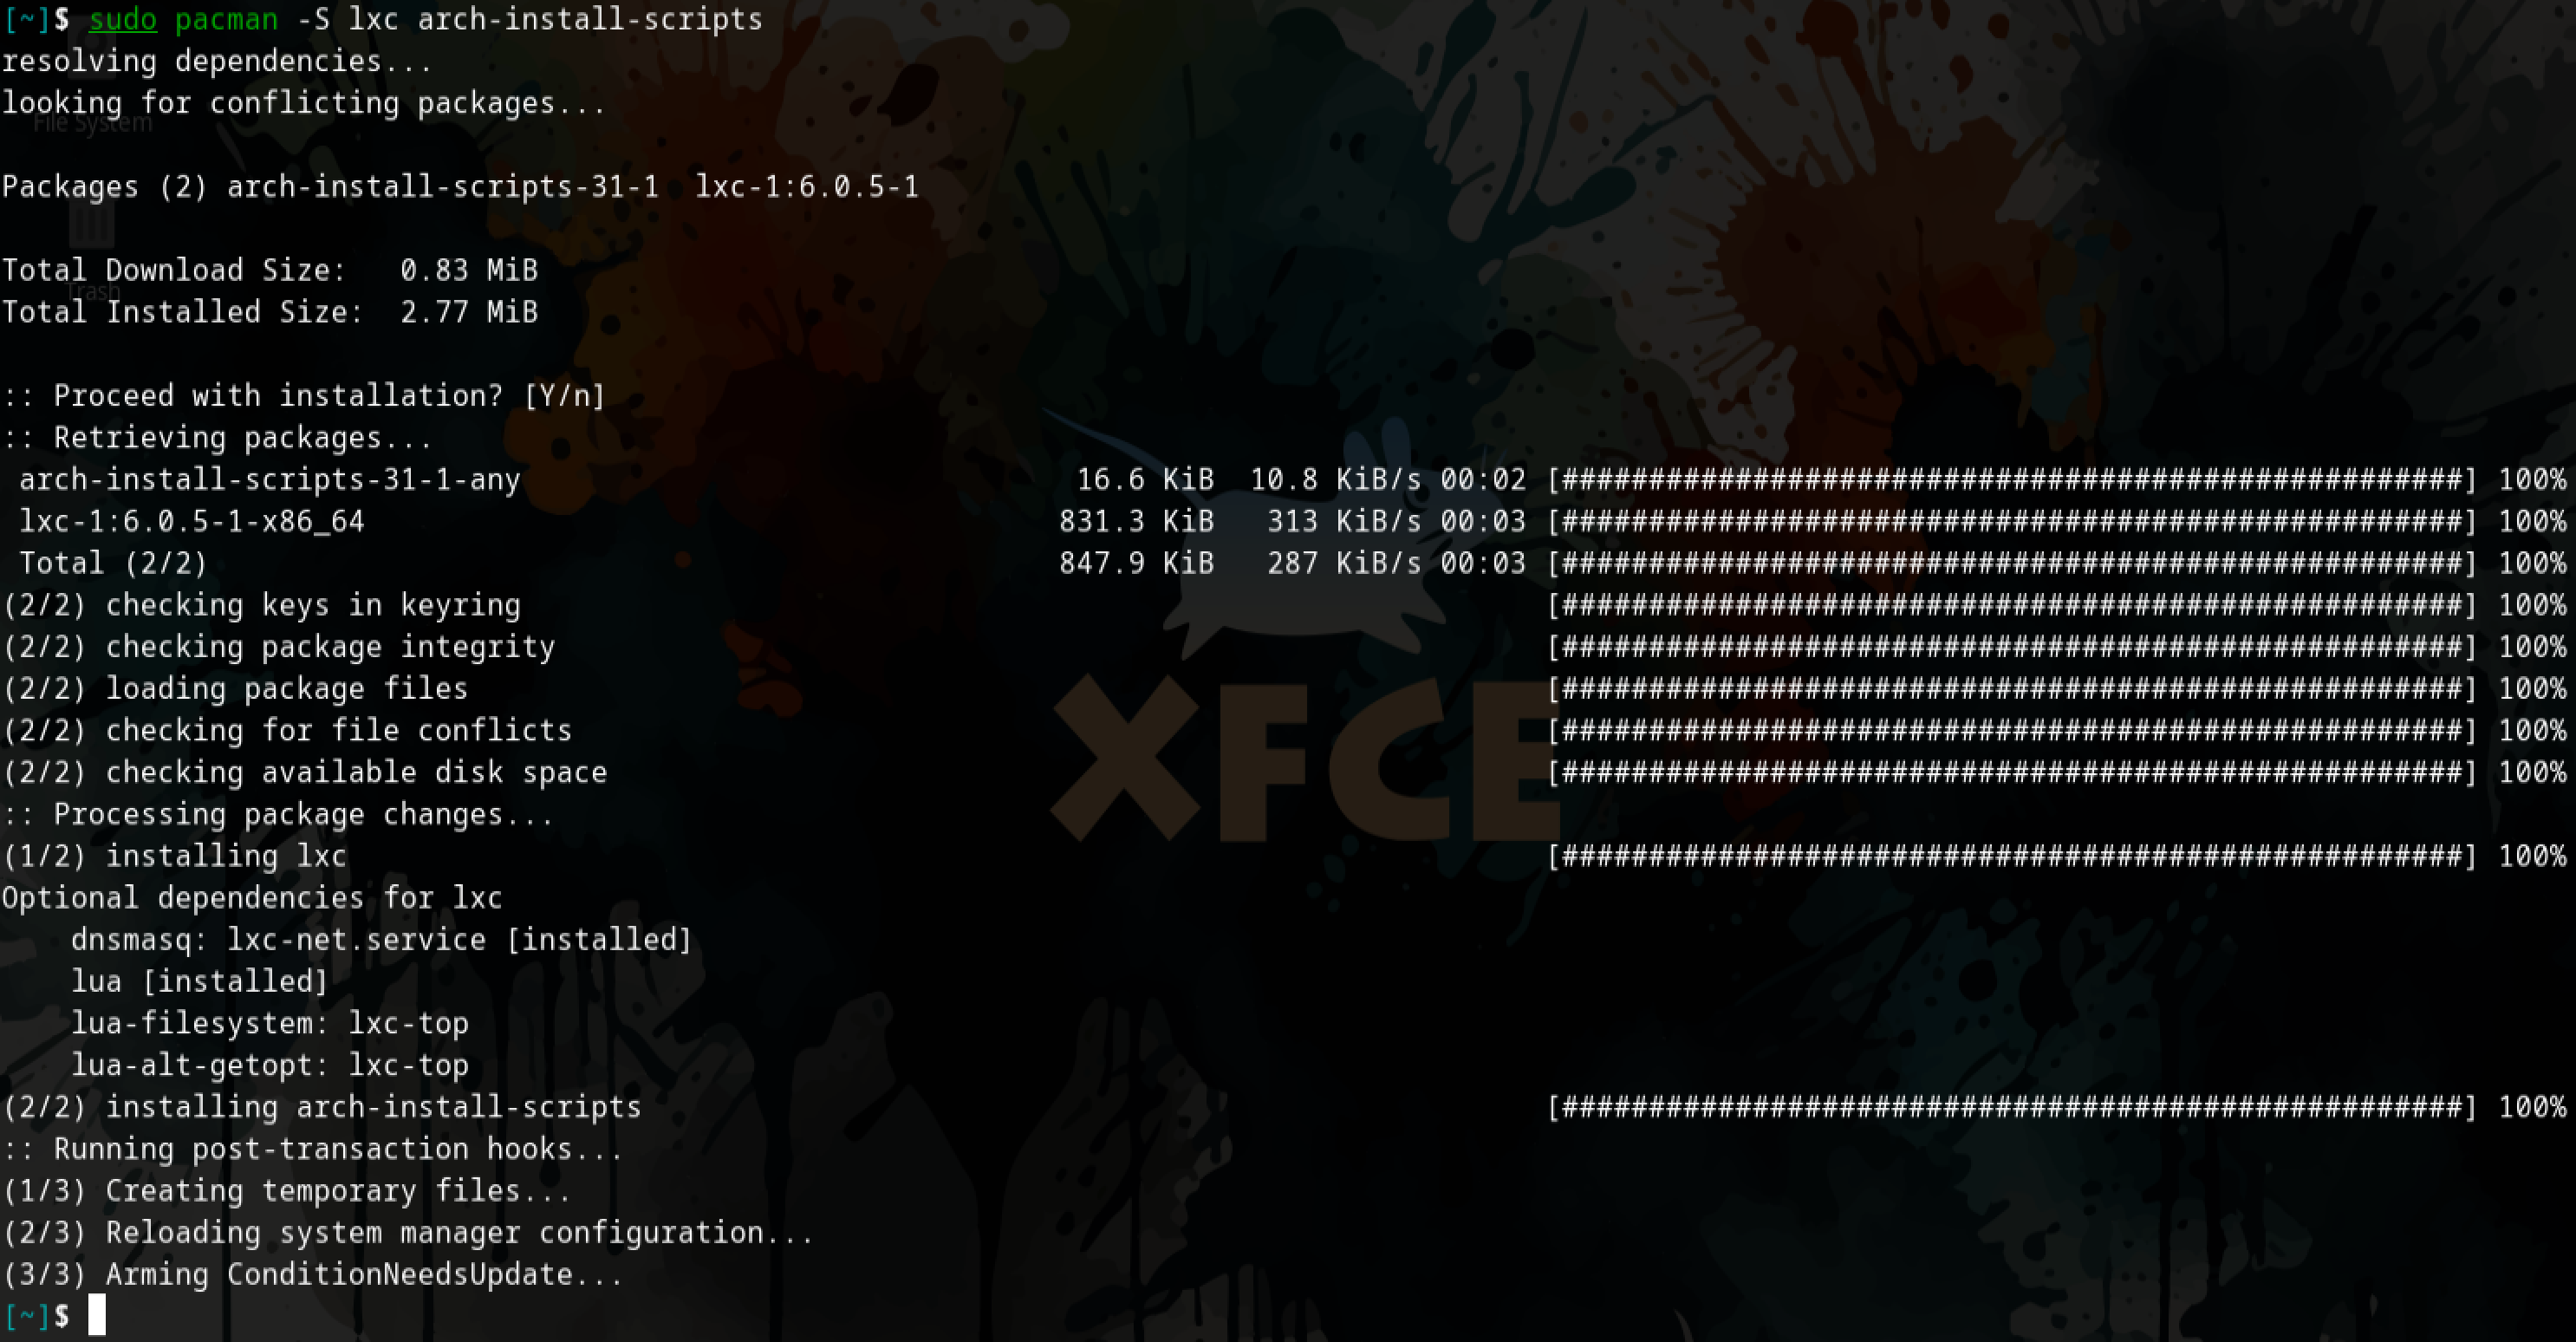 Install lxc and arch-install-scripts
Once installed they will allow you to run privileged containers on your host system.
Configuration:
LXC supports two different types of containers, they are privileged and unprivileged. When using Privileged containers the root UID within the container is mapped to the root UID on a host, a compromised container could lead to a compromised host. Unprivileged containers however, have the root UID within the container mapped to an unprivileged UID on the host, this means that even if an adversary is able to gain access to your host by escaping the container, they would find that they ideally, have limited to no rights on the host system. Unprivileged containers are considered safe by default thus Arch linux, linux-lts and linux-zen kernel packages currently provide out-the-box support for unprivileged containers.
Use privileged containers with care. There are a number of exploits which will let you escape such containers and get full root privileges on the host. If they are specifically required for your purposes then it is recommended to create them as simple as possible.
Using unprivileged containers:
First we want to enable support for unprivileged containers.
- We will modify the
/etc/lxc/default.conffile and add the below lines:1 2
lxc.idmap = u 0 100000 65536 lxc.idmap = g 0 100000 65536
 Add mapping to the /etc/lxc/default.conf file
This will map a range of 65536 consecutive UIDs, starting from UID 0 on the container-side which will be mapped to 100000 on the host-side, meaning we are allocating the UID 100000 right up until UID 165535 (100000 - 165535) for use with our Linux containers.
 A simple visual illustration of the UID and GID mapping with relation to the host and container
Then we create or modify our subordinate user ID and subordinate group ID files, /ets/subuid and /etc/subgid respectively.
Here we will allocate the containerised mapping range to each user who will interact with the lxc service or in plain English, run Linux containers. Below is an example for the root user, once done any container that is created by the root user will only run as unprivileged.
- Add your user to the
/etc/subuid. file. Below is an example where we allocate therootuser with theUIDandGIDmapping in the/etc/subuid. file.1
root:100000:65536
- Add your user to the
/etc/subgid. file. Below is an example where we allocate therootuser with theUIDandGIDmapping in the/etc/subgid. file.1
root:100000:65536
 Mapping set for both root and $USER
Control groups (cgroups):
Have a look at Rootless Containers: Enabling CPU, CPUSET, and I/O delegation for more information on rootless containers and delegating resources.
Running unprivileged containers as an unprivileged user only works if you delegate a cgroup in advance, for the user to control cpu and io resources.
1
systemd-run --unit=_myshell_ --user --scope -p "Delegate=yes" lxc-start _container_name_
Alternatively, We do this with a drop-in-file and delegate unprivileged cgroups by creating a systemd unit.
1
2
[Service]
Delegate=cpu cpuset io
 Delegation using a drop-in-file
- Now do a quick reboot.
We can verify our changes were made permanent checking the slice the user session is under has cpu and io controller permissions in the /sys/fs/cgroup/user.slice/user-1000.slice/cgroup.controllers. file.
catormorethecgroup.controllersfile:1
cat /sys/fs/cgroup/user.slice/user-1000.slice/cgroup.controllers
Output:
1
cpuset cpu io memory pids
 cat command to query the cgroup.controllers and verify the delegated resources
Network configuration:
LXC supports a number of virtual network types and devices, see here. We will be using a bridge device for this walkthrough, to be specific we will be using a NAT bridge.
A NAT bridge is very useful when considering networking for your containers, LXC ships with lxc-net which creates a NAT bridge called lxcbr0, its a standalone bridge that is not connected to the host in any way through the hosts network device or the physical network. It exists in a private subnet within the host.
 Illustration of the lxc-net bridge creating a private subnet 10.0.3.2 within the host
Another option is a host bridge, it would mean the network manager on the host would provide the networking to the container. The host and container would then be on the same network and the Linux containers running on the host could be thought of as just another device on the network which would provide some benefit when working with network-exposed services like a webserver and is simple enough but it would also incur some risk as the containers would then widen your attack-surface and should also be thought of as an added threat vector.
Below we will be using a lxc-net NAT bridge.
 Illustration of the container and host sharing a network and on the same subnet
Think of lxc-net as a Virtual NAT router.
cdinto your/etc/defaultdirectory.1
cd /etc/default
 cd into /etc/default and sudo vi lxc-net
- Create or edit the
lxc-netfile and change theUSE_LXC_BRIDGEoption totrue.
1
sudo vi lxc-net
 vi editor altering USE_LXC_BRIDGE option to true
- You can view your network interface with the
ipcommand and adding thealloption.
1
ip a
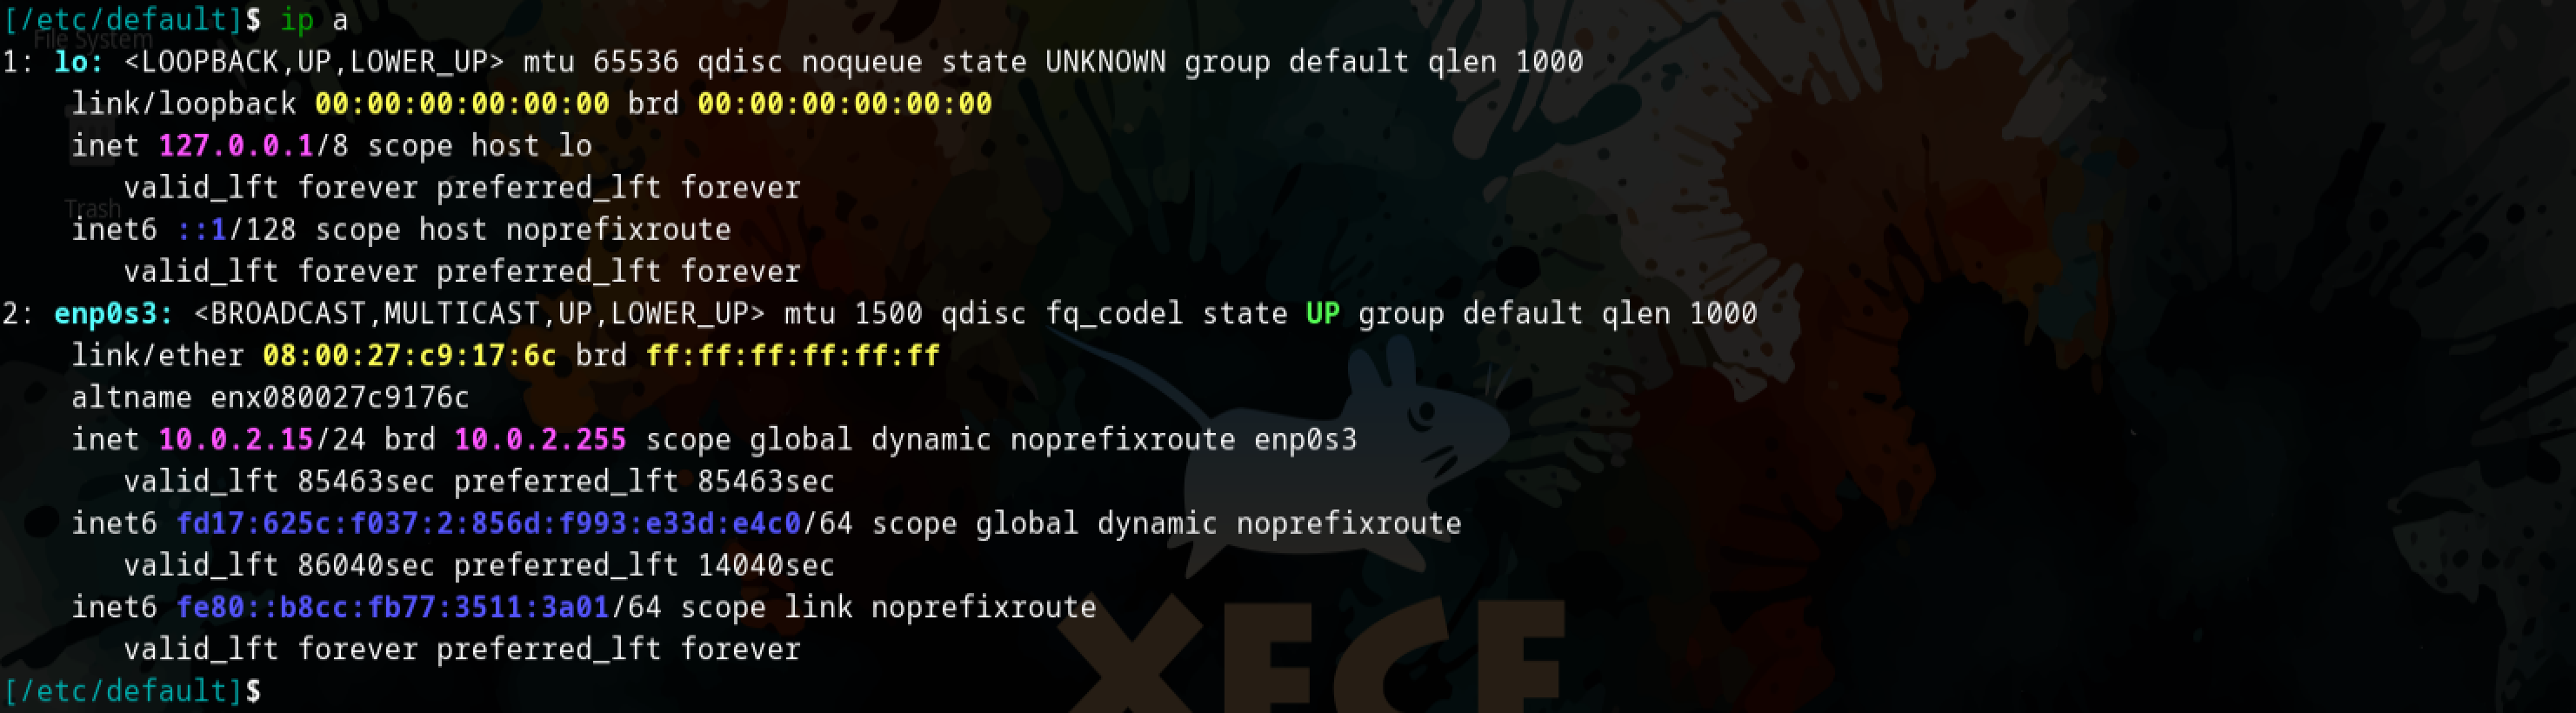 ip a on the host device before any change are made
- Now we can query the
status,enableandstartthelxc-net.servicewithsystemctlto get everything working.
1
2
3
sudo systemctl status lxc-net.service
sudo systemctl enable lxc-net.service
sudo systemctl start lxc-net.service
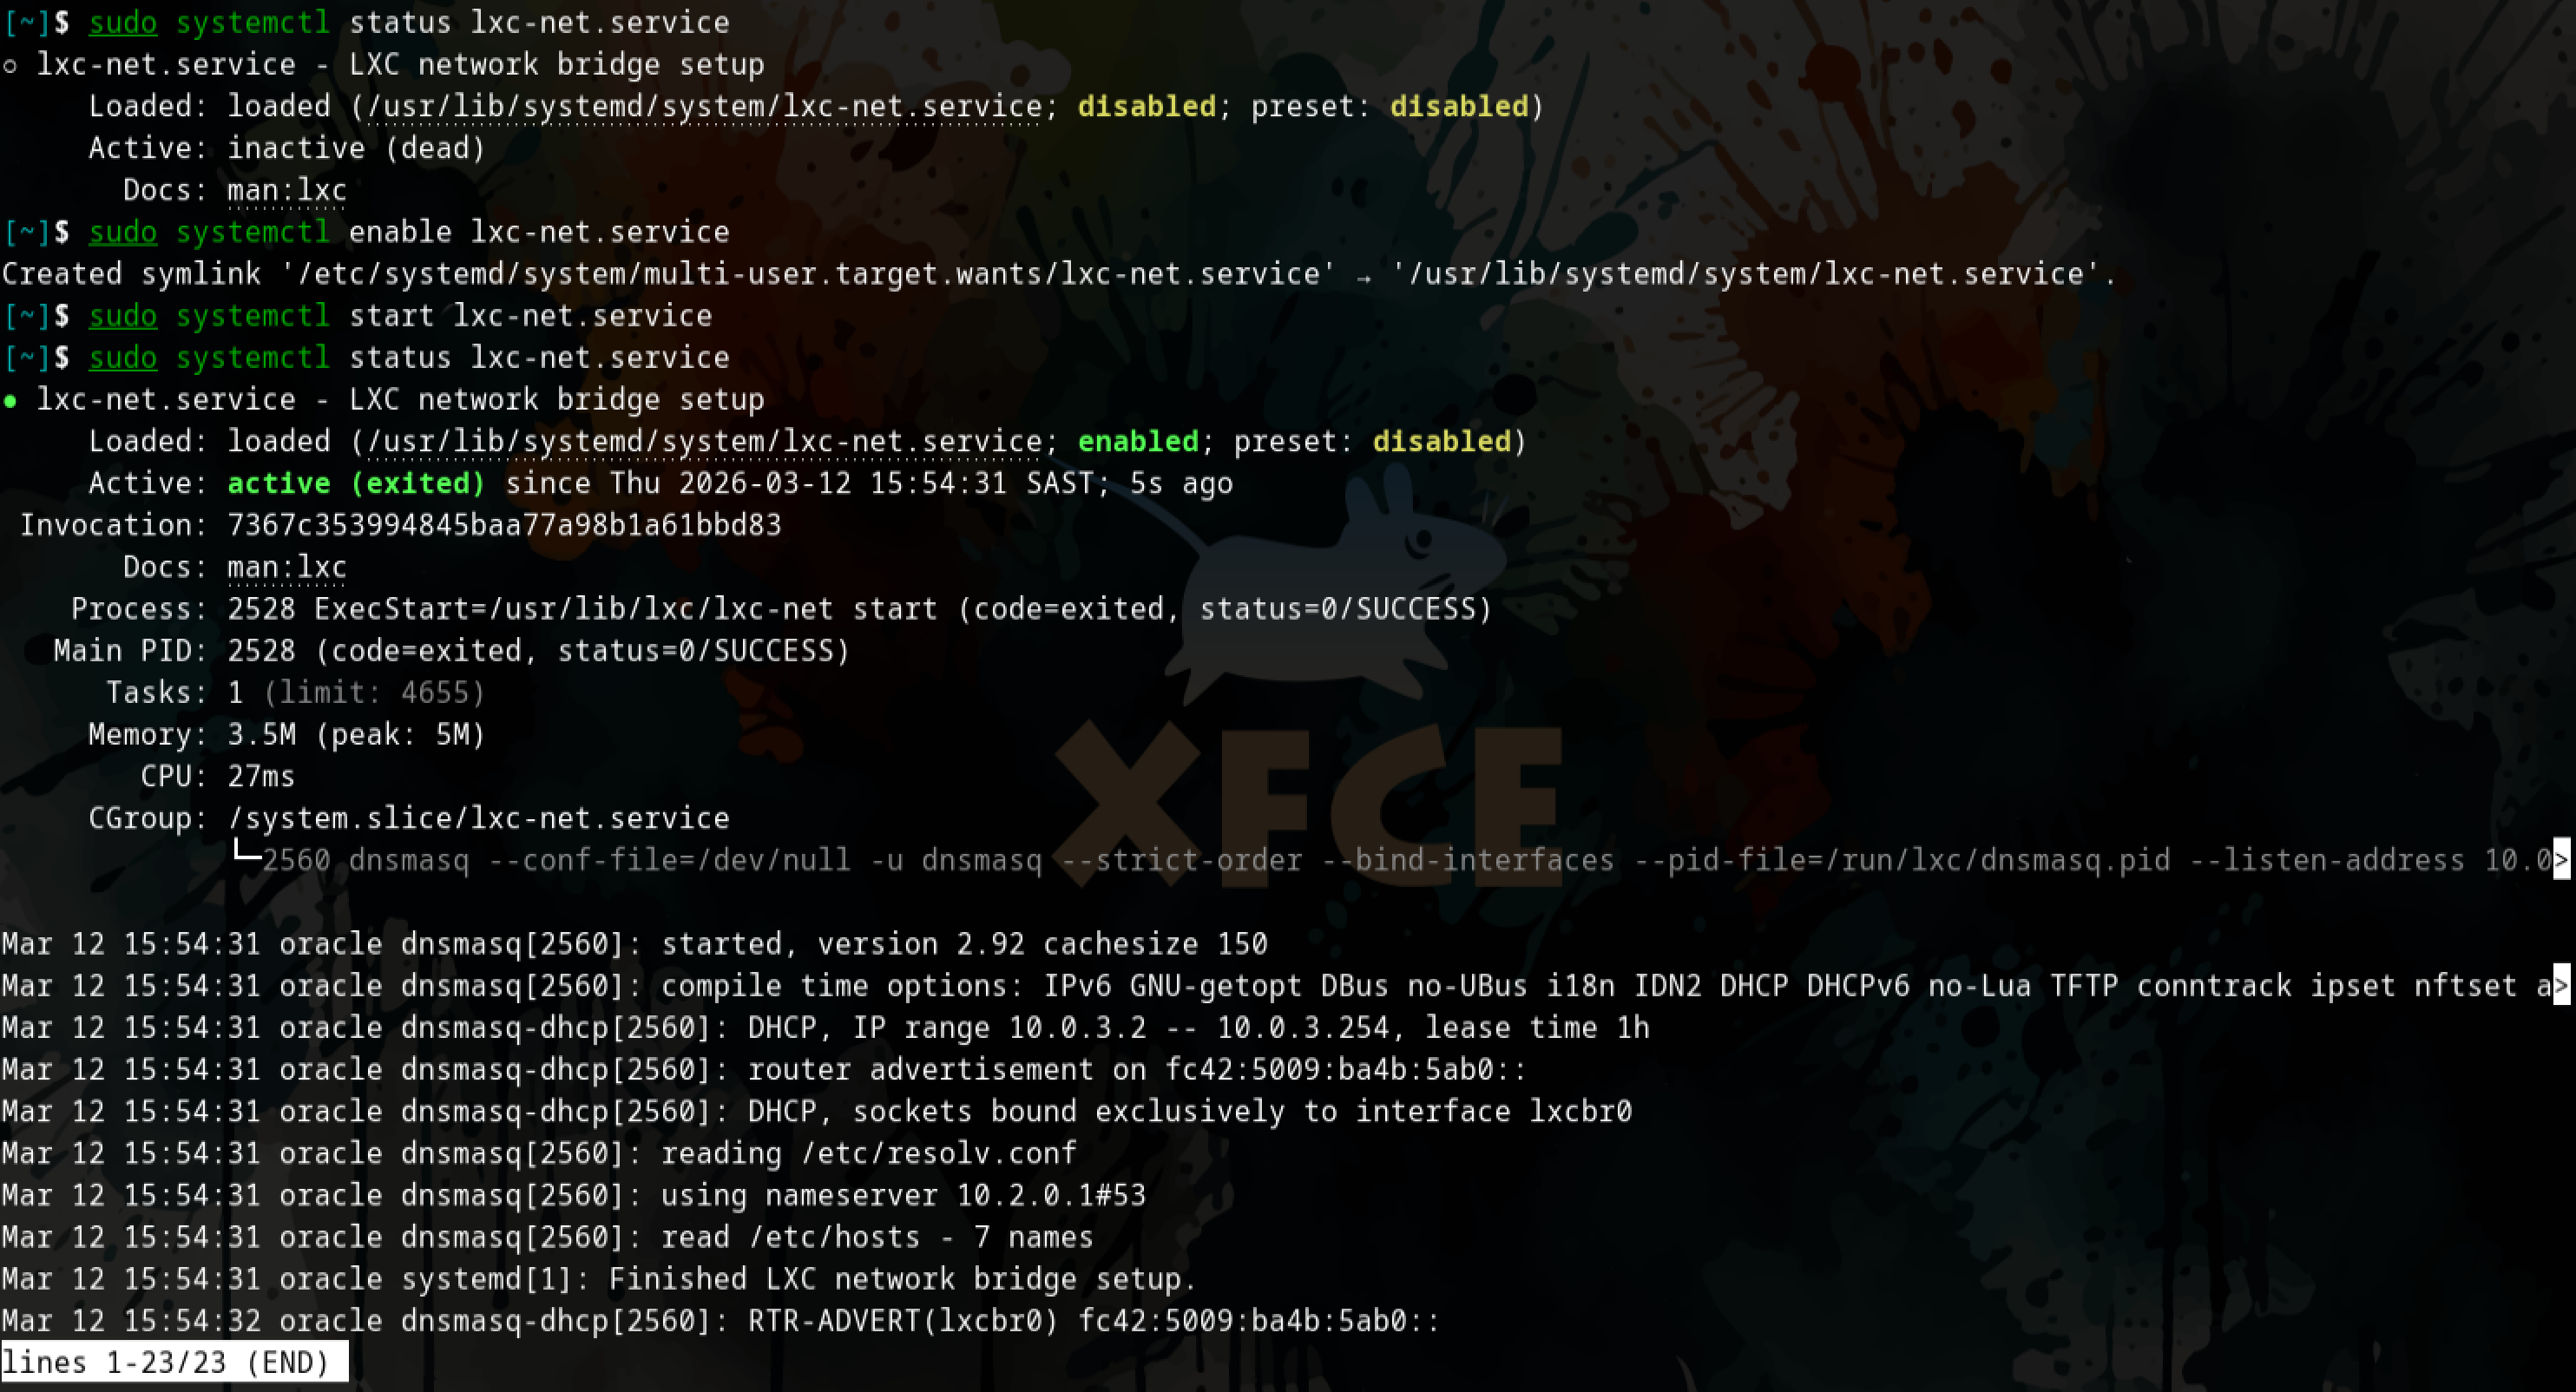 Query the status of the lxc-net service and then enable and start the service.
- Now when we query our network interfaces again you can see the
lxcbr0.
1
ip a
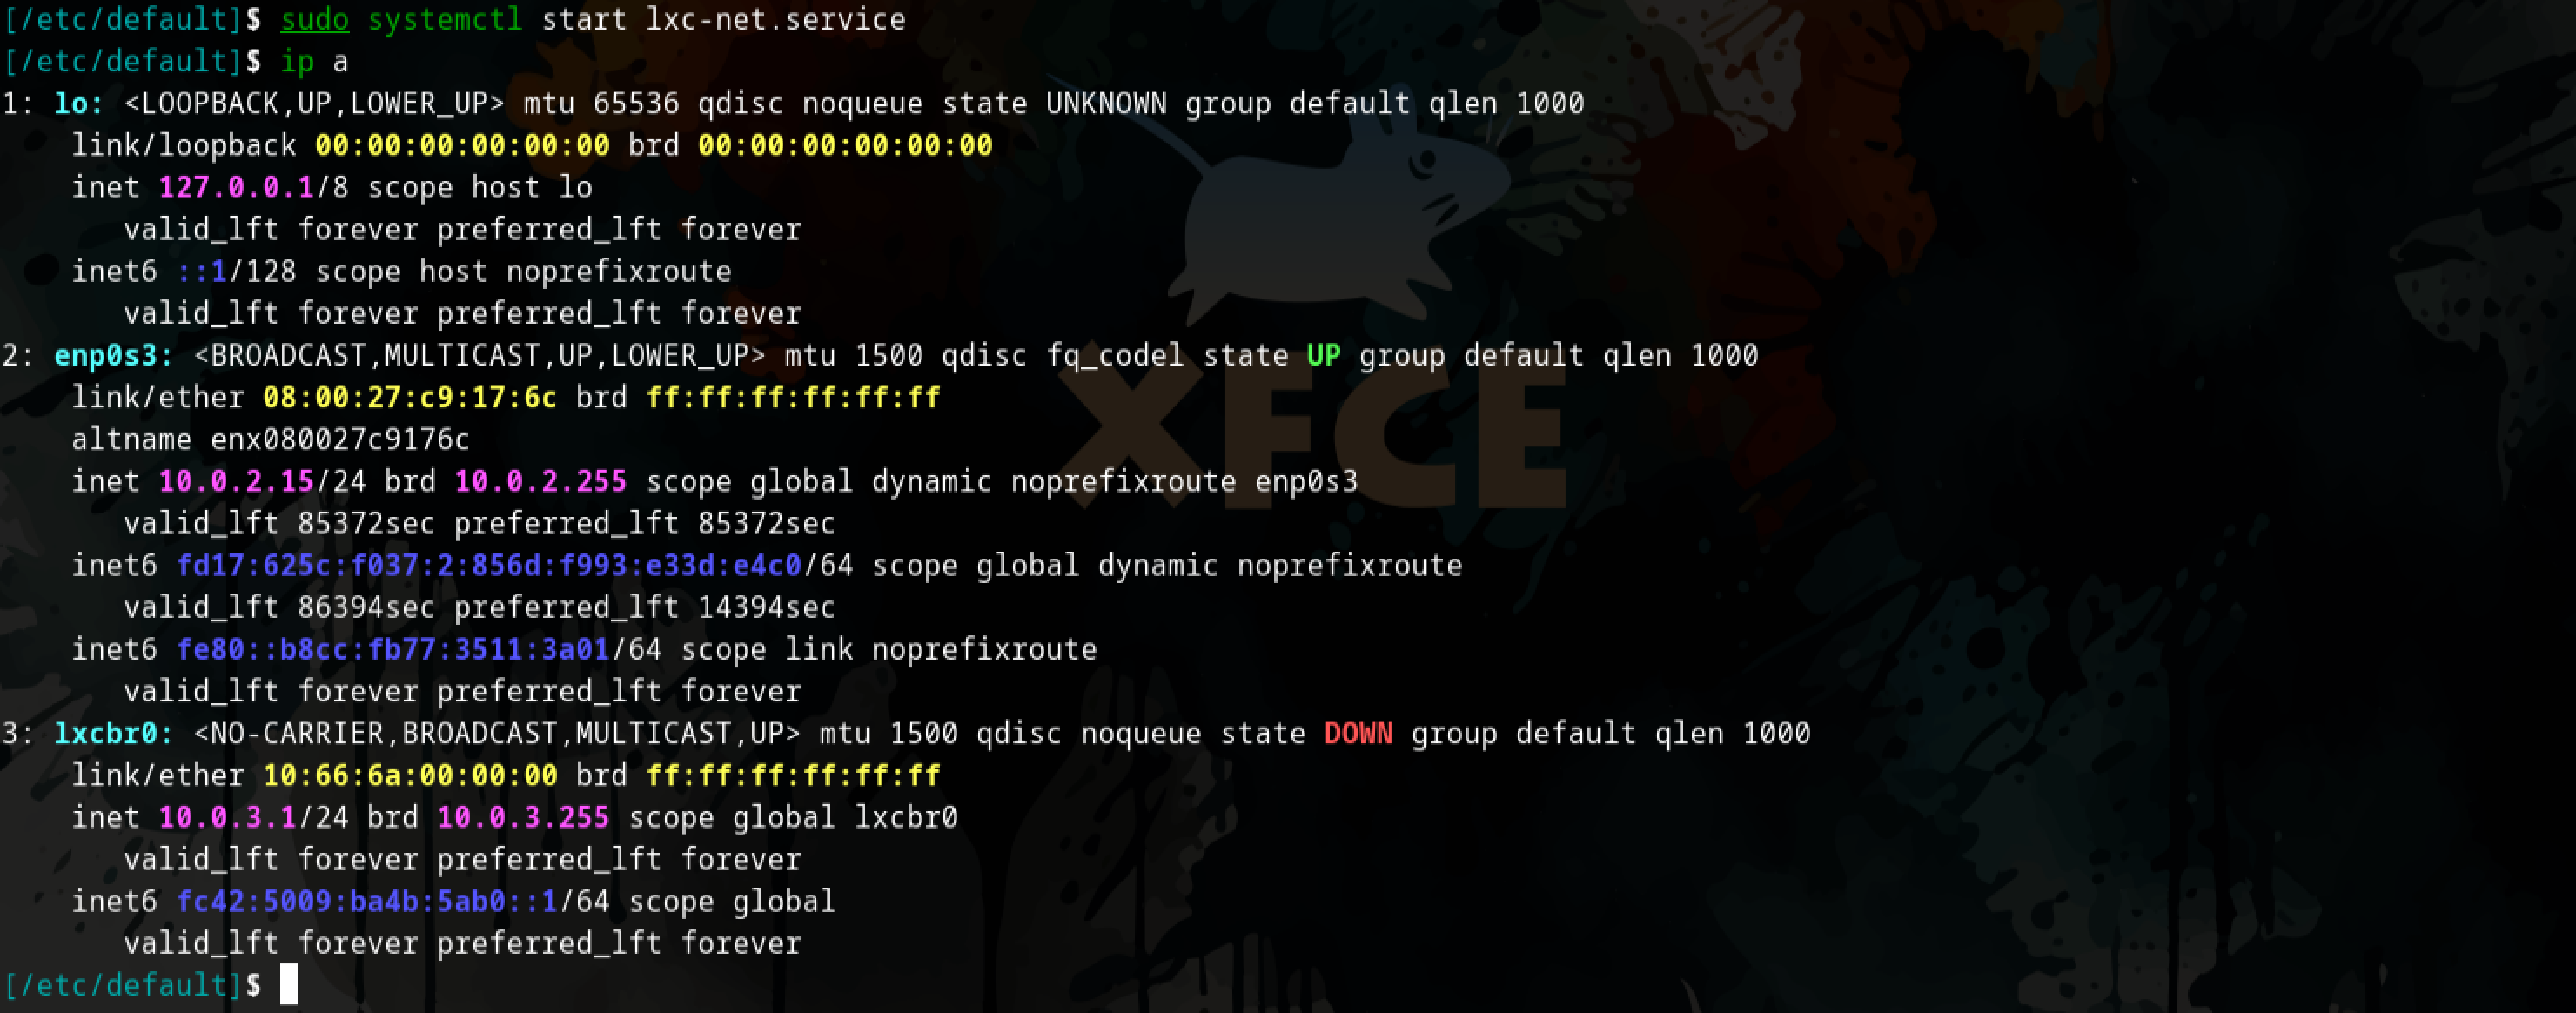 ip a on the host device after configuration, lxcbr0 now present
Firewall configuration:
Depending on the firewall configured on your system some changes can be made to have the inbound packets go from the lxcbr0 to the host and the outbound packets go from lxcbr0 through the host and to other networks.
In the below example we will use ufw.
- This can be done by running the below commands:
1
2
ufw allow in on lxcbr0
ufw route allow in on lxcbr0
 Adding firewall rules for lxcbr0 using ufw
An additional step is required according to lxc-usernet(5), this will allow non-root users to create and start containers.
- We need to create and edit the
lxc-usernetfile in the/etc/lxcdirectory.1 2
sudo touch /etc/lxc/lxc-usernet sudo vi /etc/lxc/lxc-usernet
 Create and edit the lxc-usernet configuration file
- Add the
user(your user),type(onlyveth) is currently supported,bridge(lxcbr0) created in the previous section and thenumberwhich is the number of network interfaces of a given type to be allocated to a group or user in this case.1
user type bridge number
 Verifying changes to the lxc-usernet file
A copy of the /etc/lxc/default.conf should be put into the users LXC config directory ~/.config/lxc/default.conf.
Permissions (Access)
Easiest option:
Running containers as a non-root user requires +x permissions on ~/.local/share/. Make that change with chmod before starting a container.
If this is not possible then another option in available where use an ACL entry with the execution permissions on the necessary directories. In this case $HOME, $HOME/.local, $HOME/.local/share and $HOME/.local/share/lxc
This option worked for me as I ran into permission issues when trying to start the LXC container the first time around. See be below Troubleshooting section.
More secure option:
- Running the below
setfaclcommands will grantxorexecutepermissions on the~/,~/.local,~/.local/share,~/.local/share/lxcdirectories respectively.
1
2
3
4
setfacl -m u:100000:x /home/<username>
setfacl -m u:100000:x /home/<username>/.local
setfacl -m u:100000:x /home/<username>/.local/share
setfacl -m u:100000:x /home/<username>/local/share/lxc
 Granting execute permissions
Usage:
- We can create containers with
lxc-createcommand.1
lxc-create --name <CONTAINER_NAME> --template download -- --dist archlinux --release current --arch amd64
 Using lxc-create to create our first container
- Verify:
1
more ~/.config/lxc/<CONTAINER_NAME>/config
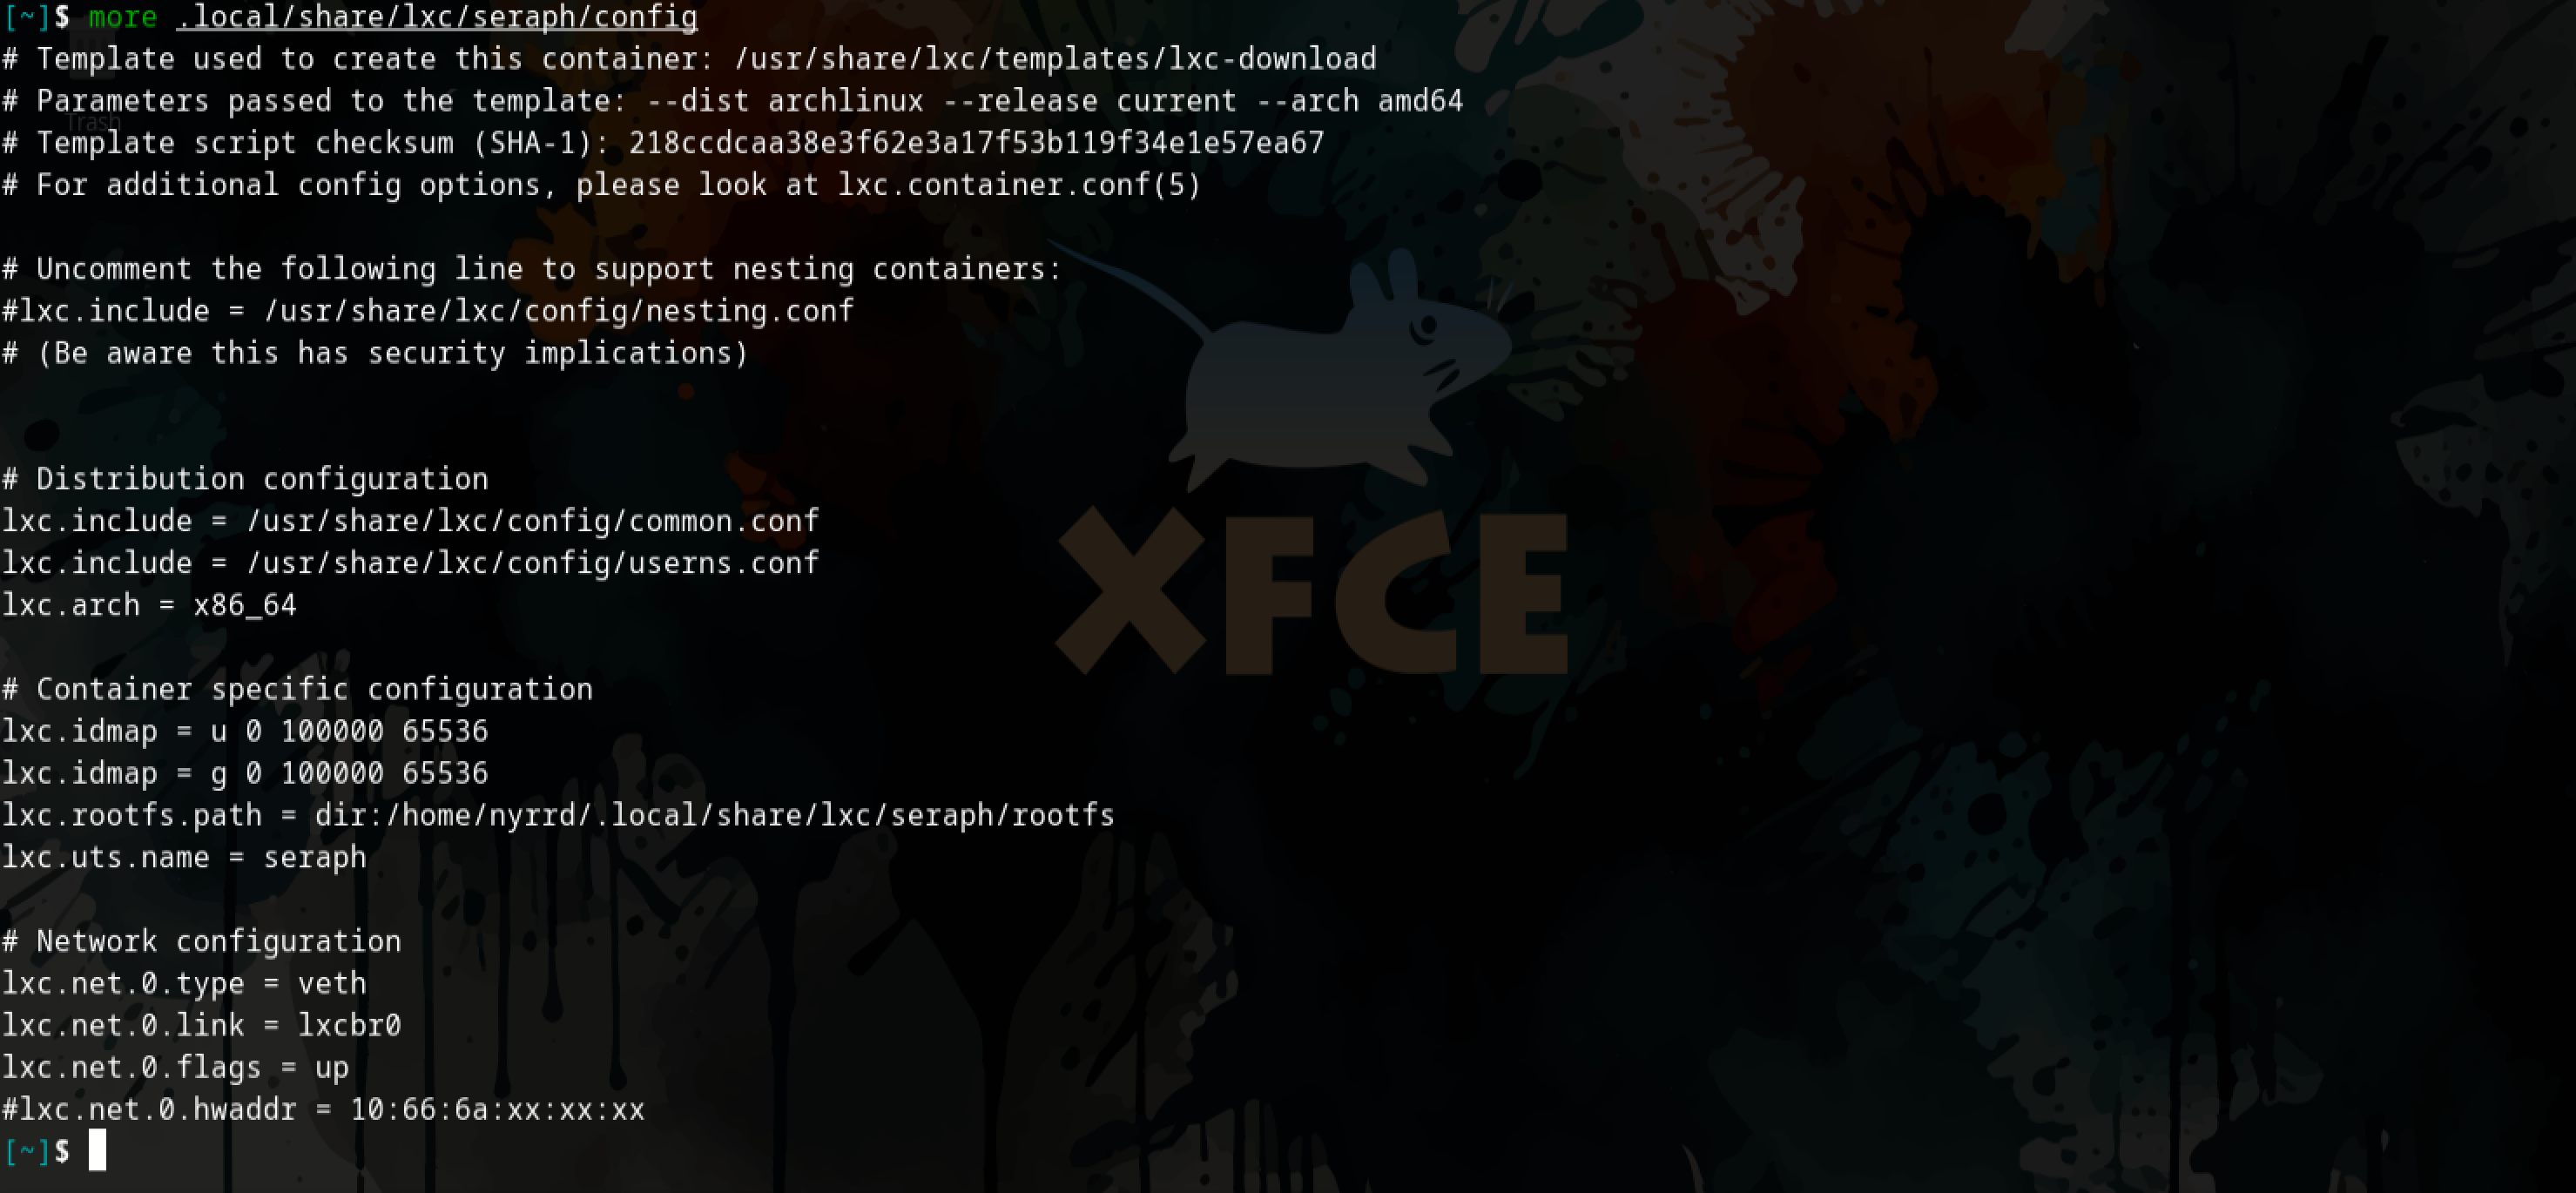 We query the newly created container config in our users local lxc directory ~/.config/lxc/
Basic commands:
- List all installed LXC containers:
1
lxc-ls -f
 List created containers
- Start any created containers by running
lxc-start1
lxc-start -n CONTAINER_NAME
 Use lxc-start to start our Linux container
- Verify status of Linux containers:
1
lxc-ls -f
 We can verify the status of the container with lxc-ls -f
- We can then stop any container with the
lxc-stopcommand:1
lxc-stop -n CONTAINER_NAME
 Stopping the container and verifying it has been stopped
Now you have two commands you can use to connect to the LXC container, primarily lxc-console and lxc-attach.
lxc-console will provide you with a login shell. Once you login you can treat the the LXC containers like any Linux system where you can operate and administer accordingly (change, passwords, add users, install packages, etc).
Connect to created containers with lxc-console:
1
2
3
lxc-console -n CONTAINER_NAME
# Optional commands if the default <Ctrl+a q>
lxc-console -n CONTAINER_NAME --escape=PREFIX # --escape=e <Ctrl+e q>
If you use the
lxc-consolecommand then escaping the login shell after you connect can be a challenge, you will have to mashCtrl,aandqtogether to escape to your terminal like this <Ctrl+a q>. This can be changed by using the--escape=<PREFIX>flag.
 Login shell after using lxc-console command
Using the lxc-attach command will connect you to the LXC container, bypassing the the login and starting you with a root prompt inside the container.
Using the --clear-env flag ensures the host does not pass its own environment variables to the container, if this is preferred then you can leave it out, that being said, you may run into issues if your containers are based on another distribution.
- Connect to container using
lxc-ttach:1
lxc-attach -n CONTAINER_NAME --clear-env
 Root prompt after using lxc-attach command
- If we are unhappy with any configuration or looking to free up space we can remove a container with
lxc-destroy.1
lxc-destroy -n CONTAINER_NAME -f
 Removing created container
Troubleshooting:
Error:
1
Permission denied - Could not access /home/<user>. Please grant it x access, or add an ACL for the container root
 Error when trying to start container
 Logging out for more information
 Tailing the log file generated for more details on errors
Cause:
Container doesn’t have permission to access to the user directories.
Solution:
1
2
3
4
setfacl -m u:100000:x /home/<username>
setfacl -m u:100000:x /home/<username>/.local
setfacl -m u:100000:x /home/<username>/.local/share
setfacl -m u:100000:x /home/<username>/local/share/lxc
References:
- https://wiki.archlinux.org/title/Linux_Containers - Arch WIki enry for Linux Containers (LXC).