How To: Install Jekyll (Static site generator)
Jekyll is a Static Site Generator

If you find any of the software shown here useful and want to show the developers some ❤️, you might consider giving them a ⭐ on GitHub or perhaps fuel their next update or release by buying them a ☕, even better would be something a little stronger 🍺 by becoming a Patron on Patreon.
Prerequisites
Jekyll requires the following:
Installing Prerequisites
Environments variables:
Below are some environment variables for export, you can add them to your .zshrc, .zshenv or .bashrc files.
XDG USER DIRS:
Below are the XDG Base Directory Specification environment variables for where to put files and configuration on your Linux system. This will ensure your $HOME is kept clean. 😉
1
2
3
4
export XDG_CONFIG_HOME=$HOME/.config
export XDG_CACHE_HOME=$HOME/.cache
export XDG_DATA_HOME=$HOME/.local/share
export XDG_STATE_HOME=$HOME/.local/state
GO:
Here we are setting the GEM_HOME directory using the gem command (This will only be possible after you have installed it) and then adding the path for GEM_HOME to our PATH environment variable.
1
2
export GEM_HOME="$(gem env user_gemhome)"
export PATH="$PATH:$GEM_HOME/bin"
Bundler:
Bundler’s home, cache and plugin directories and config file can be configured through environment variables. The default location for Bundler’s home directory is ~/.bundle. 😞
1
2
3
export BUNDLE_USER_CACHE=$XDG_CACHE_HOME/bundle
export BUNDLE_USER_CONFIG=$XDG_CONFIG_HOME/bundle/config
export BUNDLE_USER_PLUGIN=$XDG_DATA_HOME/bundle
Below is a quick snippet of code that will echo the environment variables into your .bashrc or .zshrc depending on what you are running, simply comment out or delete the other.
1
2
3
4
5
6
7
8
9
10
11
12
## Jekyll webiste
echo '# Ruby Gems' >> ~/.bashrc ##~/.zshrc
echo 'export GEM_HOME="$XDG_CONFIG_HOME/gems"' >> ~/.bashrc ##~/.zshrc
echo 'export PATH="$HOME/gems/bin:$PATH"' >> ~/.bashrc ##~/.zshrc
# Arch Wiki Ruby
echo 'export GEM_HOME="$(gem env user_gemhome)"' >> ~/.bashrc ##~/.zshrc
echo 'export PATH="$PATH:$GEM_HOME/bin"' >> ~/.bashrc ##~/.zshrc
# Bundler
echo 'export BUNDLE_USER_CACHE=$XDG_CACHE_HOME/bundle' >> ~/.bashrc ##~/.zshrc
echo 'export BUNDLE_USER_CONFIG=$XDG_CONFIG_HOME/bundle/config' >> ~/.bashrc ##~/.zshrc
echo 'export BUNDLE_USER_PLUGIN=$XDG_DATA_HOME/bundle' >> ~/.bashrc ##~/.zshrc
source ~/.bashrc ##~/.zshrc
Make sure to source your .bashrc or .zshrc files before you install the packages.
Package Installation
On Arch Linux and Arch-based we have pacman, update and then install ruby, rubygems, base-devel and ruby-erb packages. gcc and make are generally installed by default on most systems but in case it is not, make sure to install it as well.
You can run the below commands to update and install the packages:
1
2
3
4
5
sudo pacman -Syu
# Usually installed by default
sudo pacman -S gcc make
# Main packages
sudo pacman -S ruby rubygems base-devel ruby-erb
Lets check that everything is installed by checking the version for each command.
ruby --version 
gem --version 
Installation:
Now that we have installed the prerequisites, we can use gems and begin installing Jekyll and bundler.
We then run:
1
2
3
4
gem install jekyll
gem install bundler
# One-liner
gem install jekyll bundler
Check that everything is installed by querying the version for each command.
jekyll --version 
bundler --version 
You are set.
Build That S#!hit (BTS)
Project/Theme:
Now that we have everything installed, the fun can begin. You can use jekyll and start a new site or you can use a theme to get your project started. Below I have outlined examples on both.
That being said, the developers put a lot of time into their documentation, never hesitate to give it a read when you are unsure of something.
Jekyll has some good docs and a section on getting started here.
Projects:
Starting a new blog:
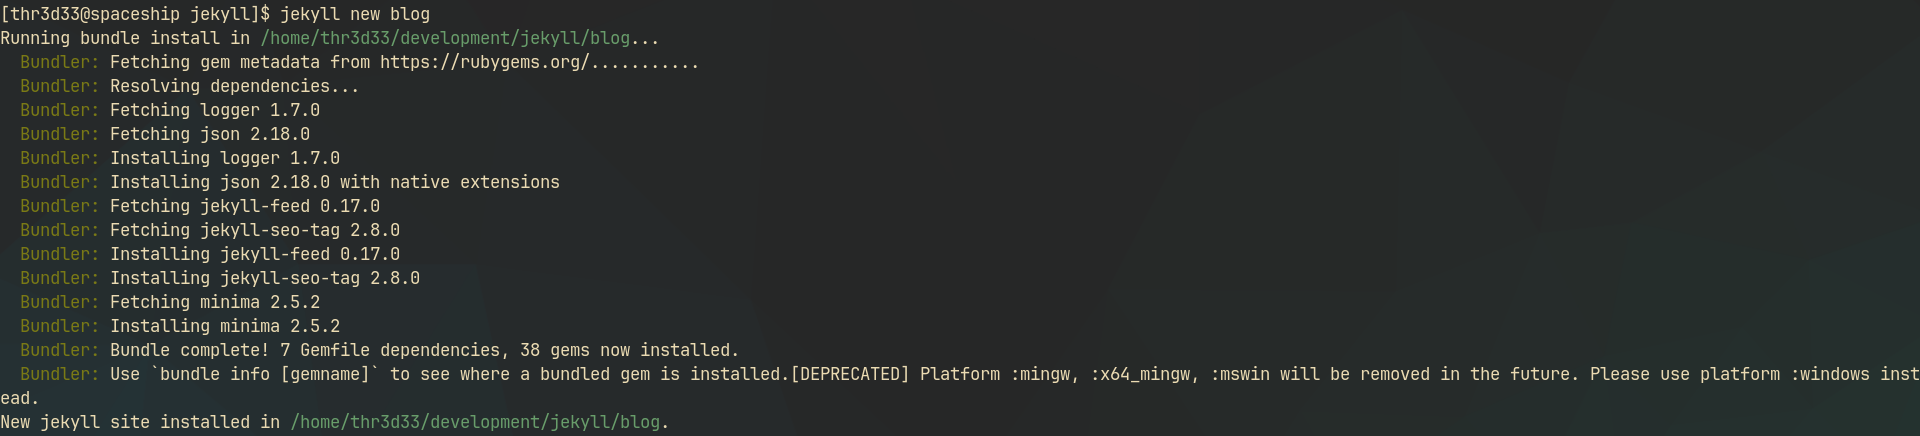
We create a new site by running below command:
1
2
# 'blog' is the name of the project (site), be sure to change it to your specification.
jekyll new blog
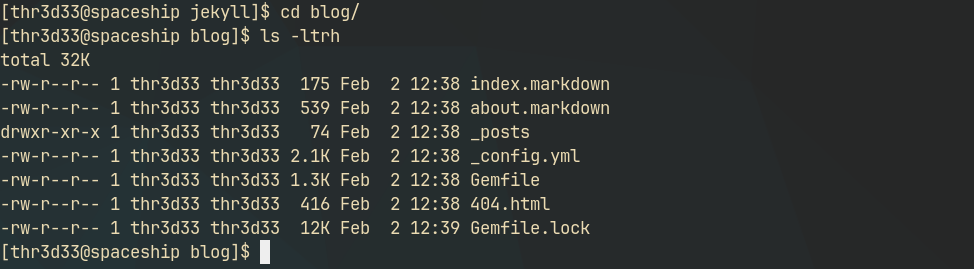
cd into your new site directory, in this case blog/ :
1
cd blog
 Build and run your
 jekyll site with the below command:
1
bundle exec jekyll serve
Visit your development site:
Your localhost on port 4000
- http://localhost:4000 -
localhost:4000
If you have a theme you want to install, there will usually be build instructions in the themes repository and generally in the
README.mdor in their documentation 📚 , these open-source developers are thoughtful that way. 😎
Theme:
Below is only a general outline, some themes might have specific dependencies and requirements, be sure to have a look at the README.md.
Install project dependencies.
Build and install dependencies for your theme by running bundle --install:
1
2
3
cd <PROJECT_DIR>
bundle --version
bundle install
You can then serve your development site on your http://localhost by running:
1
bundle exec jekyll serve
Visit your development site:
Your localhost on port 4000
- http://localhost:4000 -
localhost:4000
Real world example:
This blog is a fork of a theme that was created by this lovely animal, Cotes Chung.
If you would like to know how I installed it, have a look at this developers documentation page on getting started with GitHub pages here.
If you like this theme and the work that Cotes Chung has done, you can always show your appreciation by clicking that ⭐ and/or supporting their work with a ☕.
References:
- https://jekyllrb.com/docs/installation/#requirements - Jekyll installation requirements.
- https://jekyllrb.com/docs/installation/other-linux/ - Jekyll documentation for installing on other Linux systems
- https://jekyllrb.com/docs/installation/ubuntu/ - Jekyll documentation for installation on Ubuntu as reference for other Linux operating systems.
- https://wiki.archlinux.org/title/XDG_Base_Directory#Supported - The Arch Wiki entry for XDG application and package support.
- https://wiki.archlinux.org/title/Ruby#RubyGems - Arch Wiki entry for Ruby Gems
- Buy A Beer. https://cristalcorp.github.io/blog/2024/09/20/Jekyll_On_Arch.html - Helpful blog post for installing Jekyll on Arch Linux.